Monday, July 16, 2012

Summer Fun on the Big Lake

Just got back from one of my favorite places to vaca – South Haven, MI.  Anywhere on Lake Michigan, really.  In the winter I don’t mind getting out of my fair state, but summers in Michigan are too good to leave. 

Sand and surf – unsalted.

IMG_3316

Gorgeous sunsets.

IMG_3278

Bonfires on the beach.

IMG_3301

Blueberry picking.

IMG_3342

Me trying to prove that I was a 2nd place winner of a limbo contest back in college.

I proved nothing…except the fact my body can’t do what it used to.

And provided a little live entertainment for all to see.

IMG_3380

Launched a lantern.

IMG_3399

More breathtaking sunsets.

IMG_3404

A chance to paint your toes blue.

IMG_3459

Good times, my friends.

Good times!

Sunday, July 8, 2012

Good-Bye Project #237

Sometimes my creative visions get in the way of clearing the clutter, both in my mind and in my house.  You see, I have these two changing tables leftover from baby days.  I couldn’t simply get rid of them…I knew so much more could be done with them.  A bar cart, a buffet table on the deck, laundry room shelves.

changing table 2

The problem with these great ideas of mine is that it takes me forever to do them leaving me with a neverending to do list.  It weighs me down.  My brain and home remain cluttered.  It leaves me deflated with the fact that I still haven’t checked it off my list.

So when my sister texted me to ask if I had an extra changing table for my nephew to make a lemonade stand, I was more than happy to let it go.  Pass the torch for yet another great idea….one for someone else to do!!!!

The lesson from this.  I need to let it go.  I don’t have to DO every idea that pops in my head.  Know that something can find a new life in someone else’s home.  I don’t have to reinvent everything.  I need to make my to do list realistic so I can feel a sense of accomplishment rather than having the weight of 237 projects waiting and waiting to get checked off.  It was so liberating to put that changing table in my car.  A huge weight was lifted off my shoulders.

changing table

Good-bye Project #237!!!!

Thursday, July 5, 2012

Status Update on Homemade Laundry Detergent

Sooo, I’m very close to the end of my supply of homemade laundry detergent.

IMG_3256

Yes, the one I told you that would last a year.  I did give away two mason jars of my stash so I guestimate that I probably would have made it to September, which would have given me about 7 months.  And I probably used more per load than I needed to.  I used just about two scoops per load, but I’ve read that you could use between 1-2 scoops…so that said, that would give me enough to finish out the year had I done only 1 scoop per load.

IMG_3255

But I will say that it has proven to work great.  I’m not sure if I was imagining things, but it seemed like my clothes were extra soft when I used this homemade laundry detergent.  I have to admit that I did break down and buy a bottle of detergent as back up when I run out because although it really doesn’t take long to make, my time has been super limited these days.  It’s just the shredding of the bar soap that’s a time sucker for me because I don’t have the right tools to make it quick.  I will be making another batch soon though.  I may even get crazy and add a little essential oil for a stronger scent, not sure yet.

Just wanted to give you a heads up so you all wouldn’t be after me if your detergent didn’t last you an entire yearSmile.

Sunday, July 1, 2012

Half Bath Vanity Update: Another One Bites the Dust

I mentioned in my post on the Wall of Awesomeness, that I would probably have two more vanity doors to do something with soon.  Well, I’ve got them now.  The door finally bit the dust after hanging by a thread for about a month.

vanity door hanging

Yep, I lived with this for a month.
Don’t judge.
If you kept it shut, you could barely tell.
Wait, I take that back.
This was the state, when I finally said enough is enough and took it off.
vanity door brokevanity door off

Sure, it only took 5 minutes to finally take it off.
Things were a little busy at the time.
IMG_3232

So here’s my latest and greatest accidental update…no doors and more baskets just like the kid’s bathroom.  And once again, this accidental update adds a little more character to the space.  Or at least that’s what I’m telling myself until we do a total redo.

IMG_3238 

Oh, and these two doors won’t be added to the Wall of Awesomeness.  I’ve got a different plan for these ones.  I’ll share it with you soon.

To see more of this bathroom, click here.

Linking up to Thrifty Decor Chick.

Thursday, June 28, 2012

Organization Tips from Another Organized Friend

These first couple weeks of summer I’ve been trying to get back to square one in this crazy, chaotic house of mine.  Yesterday was supposed to be a paper purge day, but alas, I was in one of those sentimental moods and having a hard time parting with my kids’ hard work.  Part of the reason for this is that I’m not sure what I have and what I don’t have.  And I want to make sure I have a nice sampling of their work from the beginning and the end of the year for comparison.  So first, I need to collect everything in one spot and then I can purge away knowing that I’ve captured the right pieces to represent the year.

Since paper purging wasn’t going well, I ended up reorganizing some of my kitchen cupboards and finally emptied one of my craft cupboards so that it could actually hold kitchen items.  As I mentioned in this post, the goal is to move the craft stuff to the playroom.  Oh that playroom….progress is still on hold until I can get a handle on the chaos around me.

In the meantime, I’ve asked another friend to share some of her best organizing tips with us.  From the moment I met her, I could tell she had the organization gene running through her veins.  Here’s what my friend Beth pulled together for us…

Hair Accessory Storage

This was my very first Pinterest idea that I actually copied…. take an empty silverware organizer from Target ($15) and turn it into a hair supply organizer. My hair dryer goes in the wide slot that you would put plates. My straightener, brushes and hairspray goes in the spoon, fork, knife slots.

imageimage

I definitely need to use this tip.  These caddies are the perfect holder of all things.  I’ve just recently started using one on my kitchen counter to corral magazines, sunglasses and sunscreen.  I’d also like to add some bug spray to this bin and have it outside with us while we are in the backyard for easy access.

IMG_3234

I’m hoping Target still has some of these left because I’d like to get a few more to go under my sinks for cleaning supplies, sponges and washcloths…and now hair supplies!  These caddies are just so versatile.


Hygiene & Medicine Products

This is how I organize my hygiene/medicine products. These containers fit side by side in my linen closet. Each drawer is labeled with specific items. You can organize these any way that fits the needs of your family. We also keep it up high so the kids can’t get into it.

clip_image002

imageimage


Kid’s Closets

Every child’s closet should have built in organizers. As you can see, it has two levels, shelving and 4 drawers. The current season is down low, the off season is up high. There is a pull out laundry basket, which is awesome! My daughter does not need a dresser in her room because she has the four drawers for socks/underwear, pajamas, t-shirts and soccer gear.

image


Pantry & Kitchen Cupboard Organization

This is one section of my pantry. The pull out baskets are filled with kid-friendly snacks. It sure does make it easier for preparing backpacks. The kids can grab something healthy when I ask them to grab a school snack.
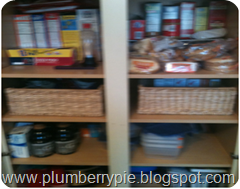
image   image


These are two of my pull out drawers in my kitchen….one on top of each other.

imageimage

Left: Yes, I know it is bad for the environment but we use paper plates for breakfast and lunch. I also store those mini circular Glad containers and its lids. I keep all of my many chip clips in a Tupperware for fast access too.

Right: Easily accessible sandwich/snack bags for lunch making. My kids love straws, so I keep those at their level. I also keep kid cups in these drawers too….all for the kids I guess!!


Organization Station

This is where it all happens. Everyone needs an office work space in their kitchen. It is nice and tidy now because it’s summer, but during the school year this space is utilized for red school folders, permission slips, teacher notes, calendars, etc. As you can see, it is cleared of all that stuff! Just the way I like it! Smile

image

The black organizer is where we keep our checkbooks, envelopes, gift cards, school phone books, city book, etc. Stamps are stored in the mini drawers toward the bottom.

image

The three slot organizer is stored above the desk in the glass cabinet. I have three kids so this works perfectly for my family. I keep classroom info for each child in the slots (curriculum night packets, notebooks, homelink letters….because I need the answer key that’s on the back.  Apparently, I can’t do math from 3rd grade and up so I need those sheets to double check answers.  (Me neitherSmile.)

image


File Organization

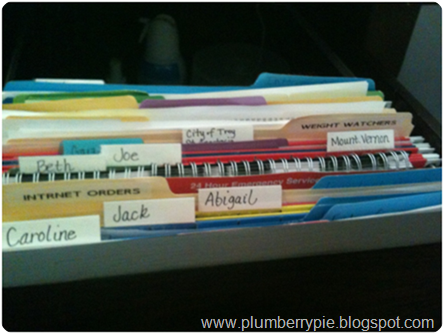
And finally, my very important, most used files.
image

This is how I do it:

Each person in the family has a file. Inside the large file folder are individual files that are labeled: school (ie: edline password, MEAP scores, etc), medical (well visit sheets with weight, height, etc), sports (extra curricular stuff).

I also have a file for important receipts. I try to go through this file at end of year. I keep some house files in this section…things that I need through the year, like: lawn service, bug control, appliance receipts with warranties. I also keep my teaching files in here in the back. I have a large file for my important documents: teaching certificate, evaluations, contracts, interview stuff, portfolio stuff.

We keep all other files in the basement! I keep these files upstairs at the desk because I know I go to these often.

Beth also took a moment to answer some of the same questions I asked my sis-in-law.

How do you tackle paper piles?

I try not to create big paper piles…the key is to go through it every day.  When I see a field trip slip I send it back the next day.  I don’t ever want to be “that parent”  who forgets.

If I do have a paper pile, I usually tackle a little at at a time. 

How do you avoid clutter?

Anyone who knows me well, knows that I can’t even be around clutter.  It makes me edgy, but let’s face it….I work full-time, so sometimes the clutter is inevitable.  I involve my kids! They must help pick up because I know they are old enough and can handle the task.  As for their rooms.  They each have a drawer or drawers that build up with junk.  We go through about four times a year. We make three piles:  keep piles,  throw away piles, Salvation Army piles.  I do the same for clothes.  We go through at the end of each season.  I am known for giving good clothes to friends with kids younger than mine. I love doing that for my friends.

Cleaning, laundry schedule?

Ugh!  This is a hard one….but it does get done…

Cleaning - I do main level one day and upper level the next day!  That system seems to work. 

Laundry - I do all sheets every other weekend, my clothes on the weekends and the kids clothes and towels throughout the week.

I use Murphy’s Oil Soap to clean my white wooden blinds.  It smells good and it really gets the dust. I do that about 4 times/year.

Thanks to Beth for all these wonderful tips.  It makes me feel more organized just reading them!  And with that, I will continue on my quest to conquer clutter!!  Hopefully I will get it together enough over the weekend so I can share the system I’m using for kids’ schoolwork.

Happy Organizing! Smile

Monday, June 25, 2012

Garbage Can Facelift

About a year and a half ago, my daughter declared she was done with the princess phase.  I was in slight denial at first and stashed all the princess dresses down in the basement thinking she was just falling prey to peer pressure at school.  Yeah, I know, peer pressure in first grade, whaaat?  Anyhow, it was true.  She dropped the princesses cold turkey.  So a year and a half later, I’ve come to terms with it and asked her if she would like a new garbage can to replace her Disney Princess garbage can.  She gave me a resounding, “Yes!”

So here’s what I did.  Grabbed this white garbage can from the bathroom section at Target for $10.

IMG_2977

It’s fine the way it is, but I thought we’d jazz it up a bit.  Grabbed my new favorite thing…you guessed it, washi tape and gave it a pop of color.

Ta-da!

IMG_3015

And guess what…she doesn’t like it.  Not colorful enough, she says!  Some people are so picky!  Thought I’d share it with you anyways because I thought it was another fun way to put that washi tape to use.  Back to square one.  I’ll let you know what we come up with.Smile

Friday, June 22, 2012

Jungle Jam

In my last post about Jungle Jam, I was a bit jungled out.  But now that it’s over, I’m happy to share the results.  Here are a few things I Iearned from this party…

  • all you need is an awesome DJ and some candy – seriously
  • you can never have enough zebra tape
  • the dollar store is your friend, but I already knew that
  • think outside the box

Here are a few cost efficient things we did to create the jungle vibe.

Upon entering the school, the kids were greeted with this super cute sign created with a green tablecloth, dollar store tiki heads, fringe, paper plates and zebra tape.

IMG_3098

One of the moms had a clever idea to put zebra tape all over paper plates, then cut out the letters from the plates. Genius!

IMG_3099

The registration table was covered in burlap and we used table fringe that was only $7 for 50 feet.  That green table fringe went a long way on many things throughout the party as did the zebra tape acting as a dual purpose functional and decorative item.

IMG_3097

IMG_3096

We used a banana leaf basket for the raffle, a little galvanized bin wrapped in that priceless zebra tape to hold our glow sticks. Each child received a glow stick at check in. This helped us know who was officially checked in.  And besides, who doesn’t love a glow stick?

IMG_3100

After checking in, the kids walked through a jungle canopy.  To create the jungle canopy, we used two rolls of green tablecloth at only $17/roll.  We were able to use binder clips to hold them on a grid on the ceiling.  Easy up, easy down and didn’t impact any of the wall art and no fretting about it falling down.

IMG_3126

We used two 30 foot rolls of kraft wrapping/mailing paper at $1 each from the dollar store to create the vines.  I simply cut strips the entire length of the roll and about 3 inches wide, then twisted them to create the vine look.  We also draped a few faux vines and hung a few tropical leaves randomly.   Big impact, little money.

IMG_3125

Once they got through the “jungle,” the kids turned the corner to get their picture taken.  I forgot to take a picture at the school, but here’s what it looked like.  We used some old, broken bamboo blinds as the backdrop and a hanging palm tree.  Since the blinds weren’t as tall as the tree, we used dollar store hula skirts to finish it off.

IMG_3055

Then, they finally entered the gym/cafeteria for the party.  Inside they would find Minute to Win It games, a baby photo contest, food and fantastic DJs that got everyone on the dance floor.  These guys were seriously the key to the success of the party.  Here’s a peek of what it looked like inside…

Those huge tiki head murals were a dollar each…can you believe it?

IMG_3101

I was going to use grass table skirts, but in the end, the cost was not worth it and did not work in the budget.  Instead, I used colorful animal print paper to create bunting around the tables.  Each pack of paper was about $4 and I think we used 3 packs.  So $12 vs. around $100 for the grass table skirts that may have fallen off or got ripped off.  I’d say that was a good trade off.

IMG_3102

Luckily, I was able to use the die cutter at the school to create leaves on the baby photo contest game.  The kids had to guess who was who.  Number 69 was my little Jakey baby.  Look at that little pudge ball.  Love it!  Oh, and once again, we used the zebra tape as both a functional and decorative tool holding up the kraft paper background.  The kraft paper was a perfect option because it gave that natural vibe and was only $1 for a 30 foot roll at the dollar store.

IMG_3103

We used zebra plates as a part of the centerpiece to offset the green tablecloth and green palm tree balloon weights.  It was an easy and cheap way to add a little flair and contrast.

IMG_3107

I just love the dollar store.  We used these cute pick signs and stuck them in buckets filled with sand as extra décor on the food tables and game tables.  They added a bit of height and didn’t take up too much space.  And at $2 each, you can’t beat it.  Notice the zebra tape once again.  Seriously, we used that zebra tape everywhere!

IMG_3109

Since the gym and cafeteria are such a vast space, we used pop up canopies to help fill the space and added table fringe attached with none other than zebra duct tape to add a tiki hut vibe.  We also threw on some battery operated paper lanterns to set the mood.

IMG_3104

IMG_3110

I used two ferns from my own front porch to hide the DJs equipment under the table and used those pick signs from the dollar store again. Also used the left over green fringe from the tiki huts to trim out the stage stuck on by zebra tape of course.

IMG_3108

To offset the 10 red doors surrounding us, we simply hung dollar store hula skirts on the handles and cut outs of toucans and parrots.

IMG_3111

For the raffle prizes, I just used simple brown paper lunch bags, fringed them, added a little green zebra paper with Jungle Jam stamped on them and tied with raffia. Barely cost anything, but added a nice touch, although I’m sure the kids did not even give them a second glance. They just wanted to see what was inside.

IMG_3088

IMG_3092

So that’s it!

The kids had a blast and I’m glad to have been a part of it!

Related Posts Plugin for WordPress, Blogger...